Add the widget to your WordPress website
Streamlined implementation with the official Corpus plugin
Incorporating the Corpus chatbot widget into your WordPress site is made effortless with the official Corpus WordPress plugin. This guide will walk you through the process of installing and configuring the plugin to seamlessly integrate your Corpus chatbot into your WordPress website.
Install the Corpus WordPress plugin
- Download the plugin: Begin by downloading the official Corpus WordPress plugin using this link.
- Access your WordPress dashboard: Log into your WordPress admin panel.
- Install the plugin:
- Navigate to 'Plugins' and click on 'Add New'.
- Click on the 'Upload Plugin' button at the top of the page.
- Choose the downloaded Corpus plugin zip file and click 'Install Now'.
- Activate the plugin: Once the installation is complete, click on 'Activate Plugin' to enable the Corpus chatbot on your WordPress site.

Configure the plugin
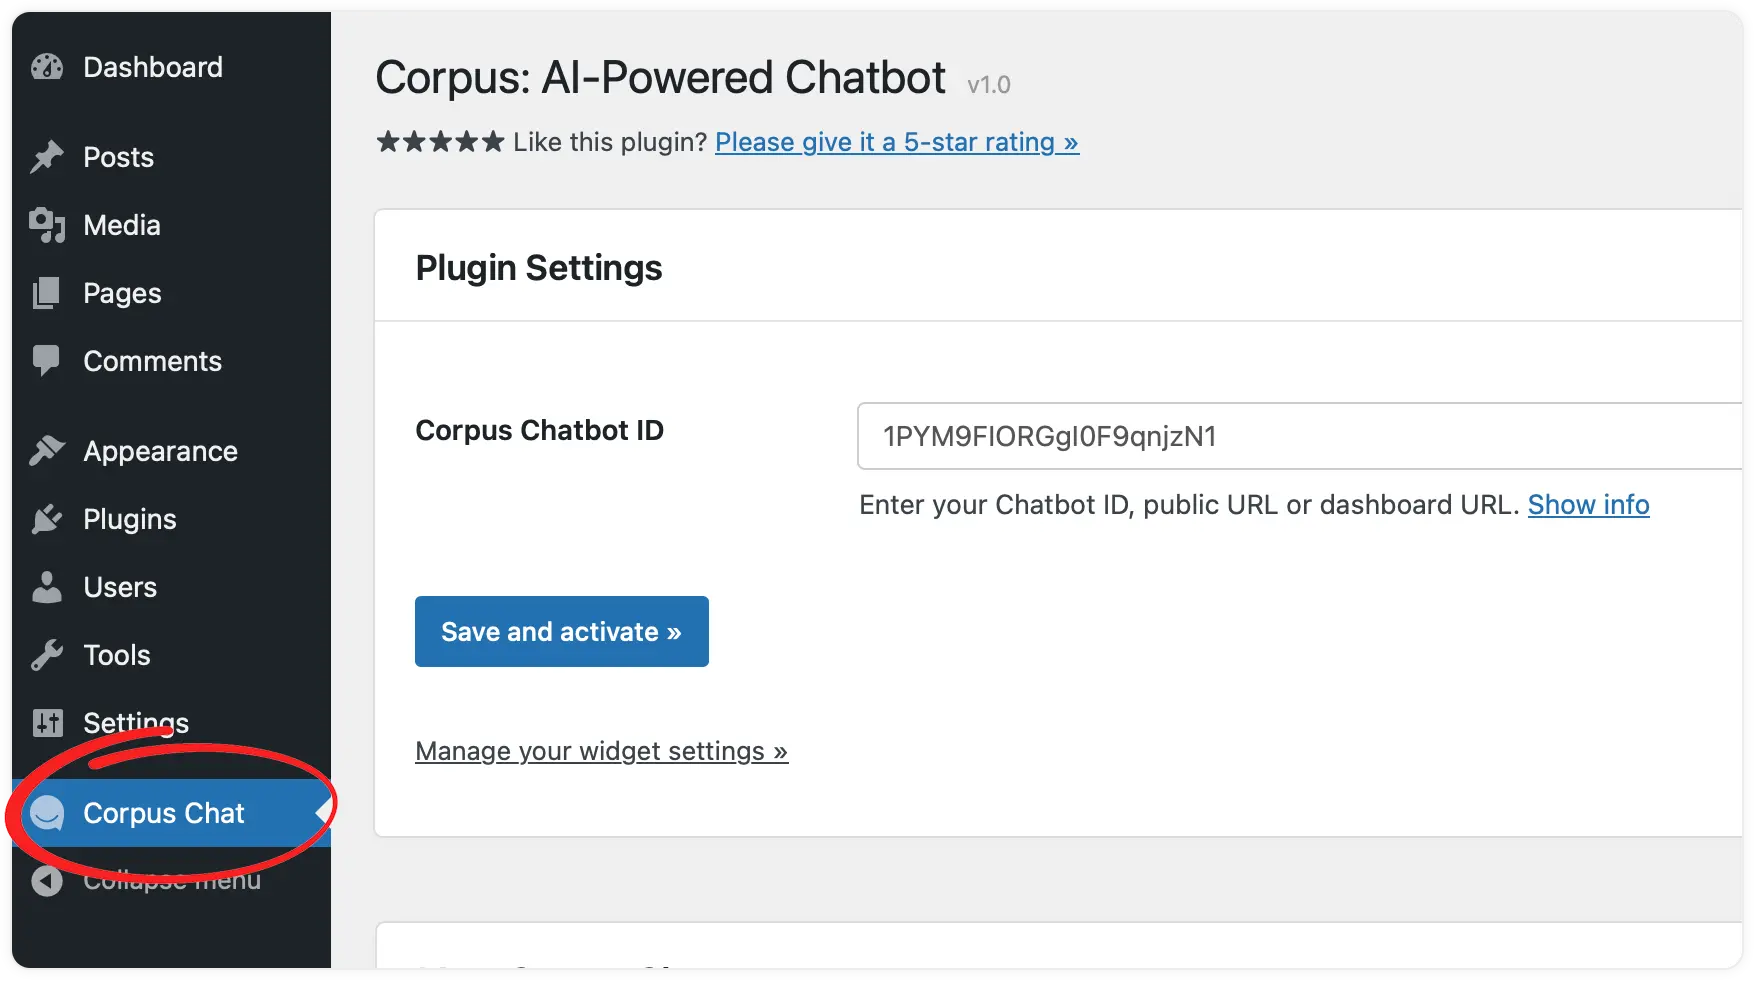
- Open plugin settings: In your WordPress dashboard, go to the settings page of the Corpus plugin.
- Get your Corpus chatbot id:
- In a new tab, log into your Corpus account.
- Select your chatbot and copy the URL from the address bar.
- Paste your Chatbot ID or URL in WordPress:
- Return to the WordPress admin site.
- Paste the URL into the "Corpus Chatbot ID" field in the plugin settings.
- Save your changes to apply the chatbot to your site.
Summary
By following these simple steps, you can easily integrate the Corpus chatbot widget into your WordPress website. This integration will enhance your site's functionality, providing your visitors with an interactive and supportive experience, and ensuring seamless user engagement through the Corpus AI chat support.
Still have questions?
Contact us.